This guide will go over all the steps from setting your sag, making tweaks to the dampening, and changing the progression of the suspension springs. By the time this article is over, you’ll have learned how to adjust bike suspension yourself. If you want the best possible performance out of your mountain bike, it’s essential that you learn how to adjust bike suspension. The suspension will affect how your bike responds to various surfaces and give you improved control while riding.
Step 1: Measure the Sag
The first thing to do when learning how to adjust bike suspension is to set up your sag. The sag is how much the actual body of your bike is settled into the suspension. Start by setting your compression and rebound all the way down to the lowest settings.
Afterward, bring your O rings down to the bottom seal of the suspension. Get on your bike and lean on a wall for support. On a balanced standing position, bounce up and down. This step will help you move the O rings to where the suspension has settled in. Carefully get off the bike (as to not move the suspension). Now that the bike is in the right position, measure how much the O ring is from the bottom of the suspension.
Step 2: Adjust Your Sag
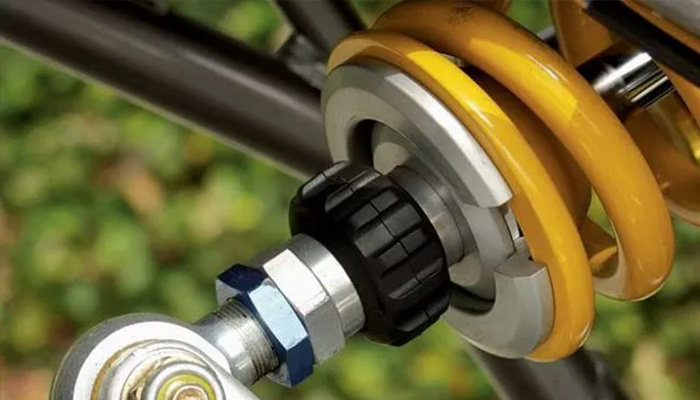
The ideal sag (marked by the O ring) should be around a quarter or a third of from the bottom of the suspension. If the sag is too high, you’ll experience bottoming up while riding. In the worst case scenario, you’ll damage your suspension. If the sag is too low, you’ll have trouble getting traction and power from your riding.
Adjust the sag for the rear shocks as well using the same method. For the rear shocks, you’ll need only to measure the exposed part of the shock. Therefore, you’ll need a ruler to track down how much the O ring has moved. That’s necessary because the smaller surface area may make it difficult to tell with your eyes alone. Keep fine tuning the adjustments and testing the sag until you’ve hit a quarter to a third from the suspension seal.
Step 3: Set Your Rebound Dampening

After setting the sag to the ideal levels, it’s time to move on to the rebound dampening. The rebound dampening shows how quickly the suspension rebounds after absorbing the shock. You want to fine tune this by putting the settings on the bare minimum. From there, you want to move it up slowly until you get a smooth feedback.
Start testing the rebound effect by slowly riding off a small ledge of around four to six inches in height. This will give you feedback as to how much the suspension bounces up. What you want to do is keep moving up the rebound dampening settings until the pogo effect is mostly neutralized. There isn’t a precise science as to what the right settings are. Usually, riders change the dampening to their preference over time.
Step 4: Set Up Your Compression Dampening
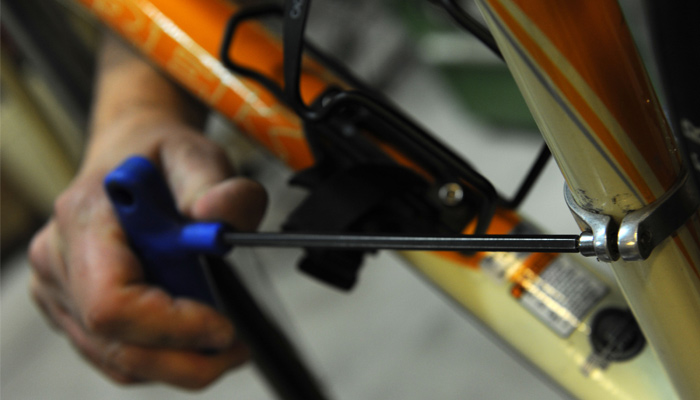
If the OEM suspension on your bike or your custom suspension offers adjustable compression, you want to make sure you optimize it for the perfect ride. The compression dampening controls represent, as its name states, how much your suspension compresses to pressure. Too much compression and your bike will transfer the pressure back on the body of the bike. Too little compression and you’ll have a suspension that isn’t stable.
Like the rebound dampening, you want to find a middle ground. Start from the lowest settings and move your way up as you test the suspension. Ideally, you want a suspension that is stable for most situations. The amount of compression dampening will depend on your preferences and also the surface you’ll be riding in. If you feel like your suspension is still unstable after the first three steps, optimize the compression until you get the right feeling.
You Might Also Like: The best full-suspension mountain bikes under 1000 dollars
Step 5: Work with Preset Compression Settings
Some OEM parts or suspension systems will not come with features that allow for manual compression dampening. Instead, they’ll have preset configurations that are fitted to various situations. For instance, there may be a setting that will configure for downhill conditions while there will be another for uphill climbing.
Most suspension systems that have preset configurations come with a trail mode that is an all around setting. This will be ideal for most riders. However, you should still be open to changing the settings based on the conditions.
Step 6: Set up the Spring Progression
The final step is to test the spring progression. This is not an obligatory step when learning how to adjust bike suspension. However, it’s a great customization to add if you’re somebody that wants the best possible performance out of your bike. Spring progression basically refers to how you want the suspension to act based on how far it travels down to the seal.
This basically means that the first quarter of your suspension can be configured as normal while the last quarter can offer greater resistance for those big landings. In order to add spring progression, you’ll have to buy volume spacers into your suspension.
Nonetheless, his is really a matter of personal preference. While you might feel no difference now, you’ll want to customize as you get the hang of how you want to ride. While you cannot do this with all suspension systems, many of the latest models do offer this choice.
Conclusion
That ends our guide on how to adjust bike suspension. As you can see, optimizing your suspension to your needs isn’t as technical or difficult as you probably thought. It’s just about walking through a couple of simple steps and making small adjustments along the way.
A big part of learning how to adjust bike suspension properly is testing the different settings and seeing how it performs while you’re actually riding. You should start by following the general recommended guidelines. However, you’ll find yourself making small tweaks along the way. You’ll eventually want to customize the suspension setting to your needs so that you can get the most out of your suspension.